BigQuery Destination Setup Guide
Pre-requisites
-
A GCP Project with BigQuery enabled.
-
A dataset already created within BigQuery to serve as the destination for synced data.
-
(Optional) If using your own custom service account, a Google Cloud Service Account with a Service Account Key file generated.
- You can create a Service account key using the Google Cloud console, the gcloud CLI, or one of the client libraries.
-
Grant access to your project by following Google's documentation on how to Manage access to projects, folders, and organizations. Your service account will need the following permissions:
- BigQuery User (roles/bigquery.user) – read the dataset's metadata and list tables in the dataset, run jobs, including queries, within the project.
- BigQuery Admin (roles/bigquery.admin) – provides full control over all BigQuery resources in the project. Create, update, delete datasets and tables, and run queries and load/export jobs.
Setup Guide
Step 1: Find your Project ID
Go to your Google Cloud Console's projects list.
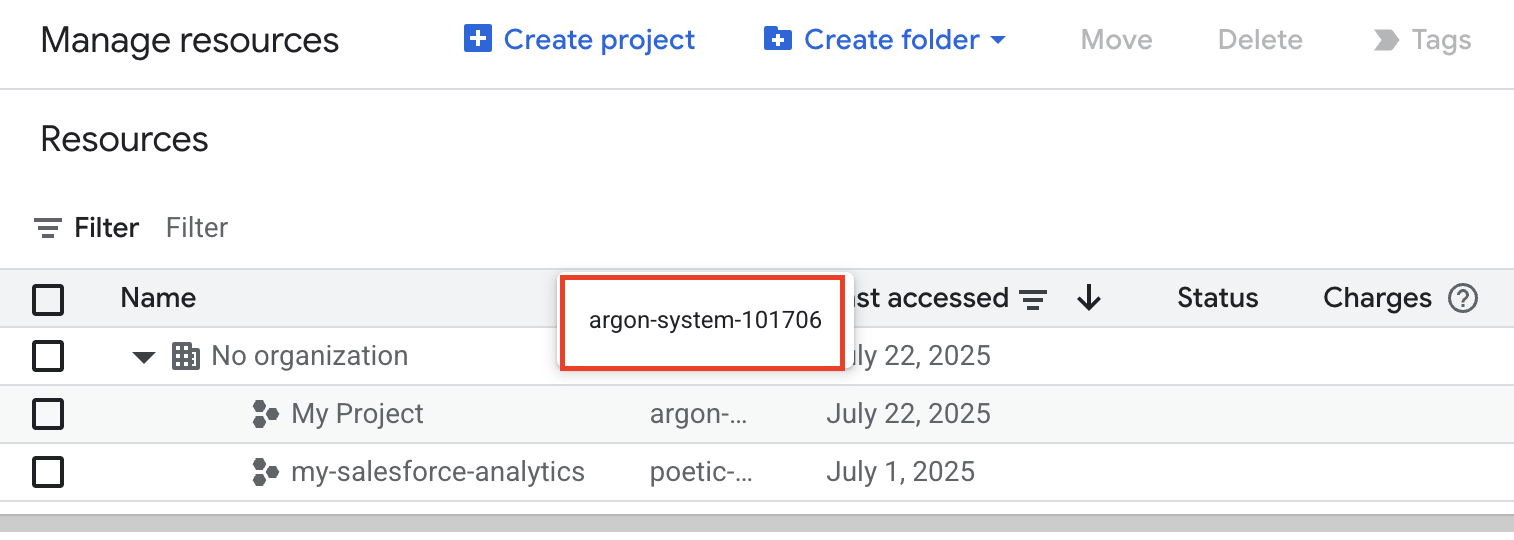
Find your project on the list and make a note of the Project ID in the ID column. You will need it to configure Matia.
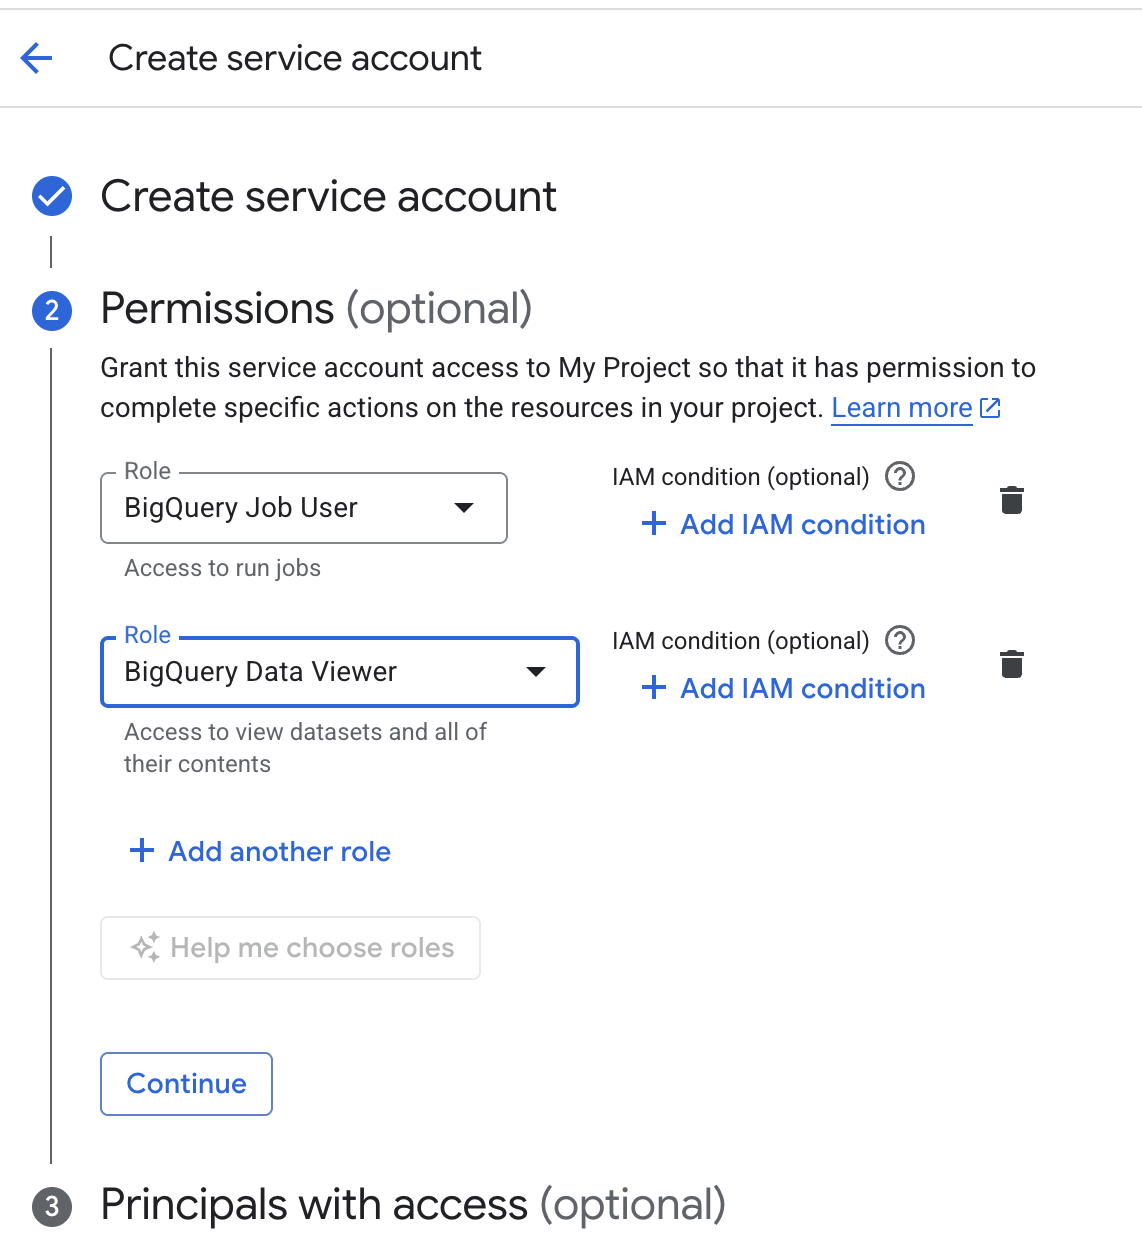
Step 2: Grant Service Permissions to your Service Account
- Go to your Projects and click Create Service Account.
- Click on permissions and add permission for BigQuery Admin or BigQuery User.
Option #2: Using gcloud CLI (Dataset-level example)
You can also use the gcloud CLI to update dataset-specific access:
bq update --dataset --access \
  "entity=serviceAccount:matia-e94b127523ad@matia-main.iam.gserviceaccount.com,role=READER" \
  matia-main:your_dataset_name
Step 3: Create a Service Account Key
- Click on Create a new Service Account.
- Select the new Service Account from the list of service accounts.
- On the Keys tab, click Add key and create a new JSON key. Make a note of the entire service account key file. You will need it to configure Matia.
- The key must be in the following JSON format:
{
    "type": "service_account",
    "project_id": "PROJECT_ID",
    "private_key_id": "KEY_ID",
    "private_key": "-----BEGIN PRIVATE KEY-----\nPRIVATE_KEY\n-----END PRIVATE KEY-----\n",
    "client_email": "SERVICE_ACCOUNT_EMAIL",
    "client_id": "CLIENT_ID",
    "auth_uri": "https://accounts.google.com/o/oauth2/auth",
    "token_uri": "https://accounts.google.com/o/oauth2/token",
    "auth_provider_x509_cert_url": "https://www.googleapis.com/oauth2/v1/certs",
    "client_x509_cert_url": "https://www.googleapis.com/robot/v1/metadata/x509/SERVICE_ACCOUNT_EMAIL"
}
- PROJECT_ID: Your Google Cloud project ID. Project IDs are alphanumeric strings, like my-project.
- SA_NAME: The name of the service account that you want to create a key for.
Step 4: Grant Service Account Configuration
Option #1: At the Project level
- Go to the IAM page in Google Cloud Console.
- Select your project (e.g., matia-main).
- Click “Grant Access” (or the “+ Add” button).
- New principal: Paste the service account email: matia-e94b127523ad@matia-main.iam.gserviceaccount.com
- Assign the following Big Query Roles
- Click Save.
Option #2: Grant Service Account Configuration at the Dataset level
- Go to the BigQuery Console.
- In the Explorer pane, expand your project (matia-project), you’ll see a list of datasets under the project — those are your database names.
- On the Details tab (on the right side), look for Location. This will say something like us or europe-west2.
- Click the arrow next to the dataset you want to share, then click “Sharing”.
- In the “Dataset permissions” window, click + Add Principal.
- Add the service account email
- Assign dataset-specific roles (BigQuery Data Admin or User)
- Click Done
Step 5: Complete Configuration in Matia
You have the option to use the service account autogenerated by Matia
or your own custom service account.
If you are using Matia’s autogenerated service account:
- Authorize access to your project by sharing it with the email address: matia-e94b127523ad@matia-main.iam.gserviceaccount.com
- Provide your Project ID (e.g matia-main).
- Provide your Location where your dataset is located (e.g us or europe-west1).
If you are using your own custom service account:
- Enter the Private Key from the JSON file when creating Service Account Key earlier.
- Enter the Client Email from the service account that you created.
- Enter the Project Id your BigQuery project id.
- Enter a Location where your dataset is located (e.g us east). Note: You cannot change the dataset location once the connector is created.
- Enter an Asset Name.
- (Optional) Enter an Asset Description
- (Optional) Assign Tags.
- Select an Owner.
- Verify that your BigQuery account is successfully connected by clicking on Test Connection.
- Click Connect.
Supported Streams
All tables in specified dataset are supported (Full Refresh)