Databricks Setup Guide
Prerequisites
- A Databricks account with the premium plan or above
Get Server Hostname, Port, and HTTP path
-
Log in to your Databricks workspace.
-
In the Databricks console, click + New > More > SQL warehouse.
-
Create new Matia SQL Warehouse.

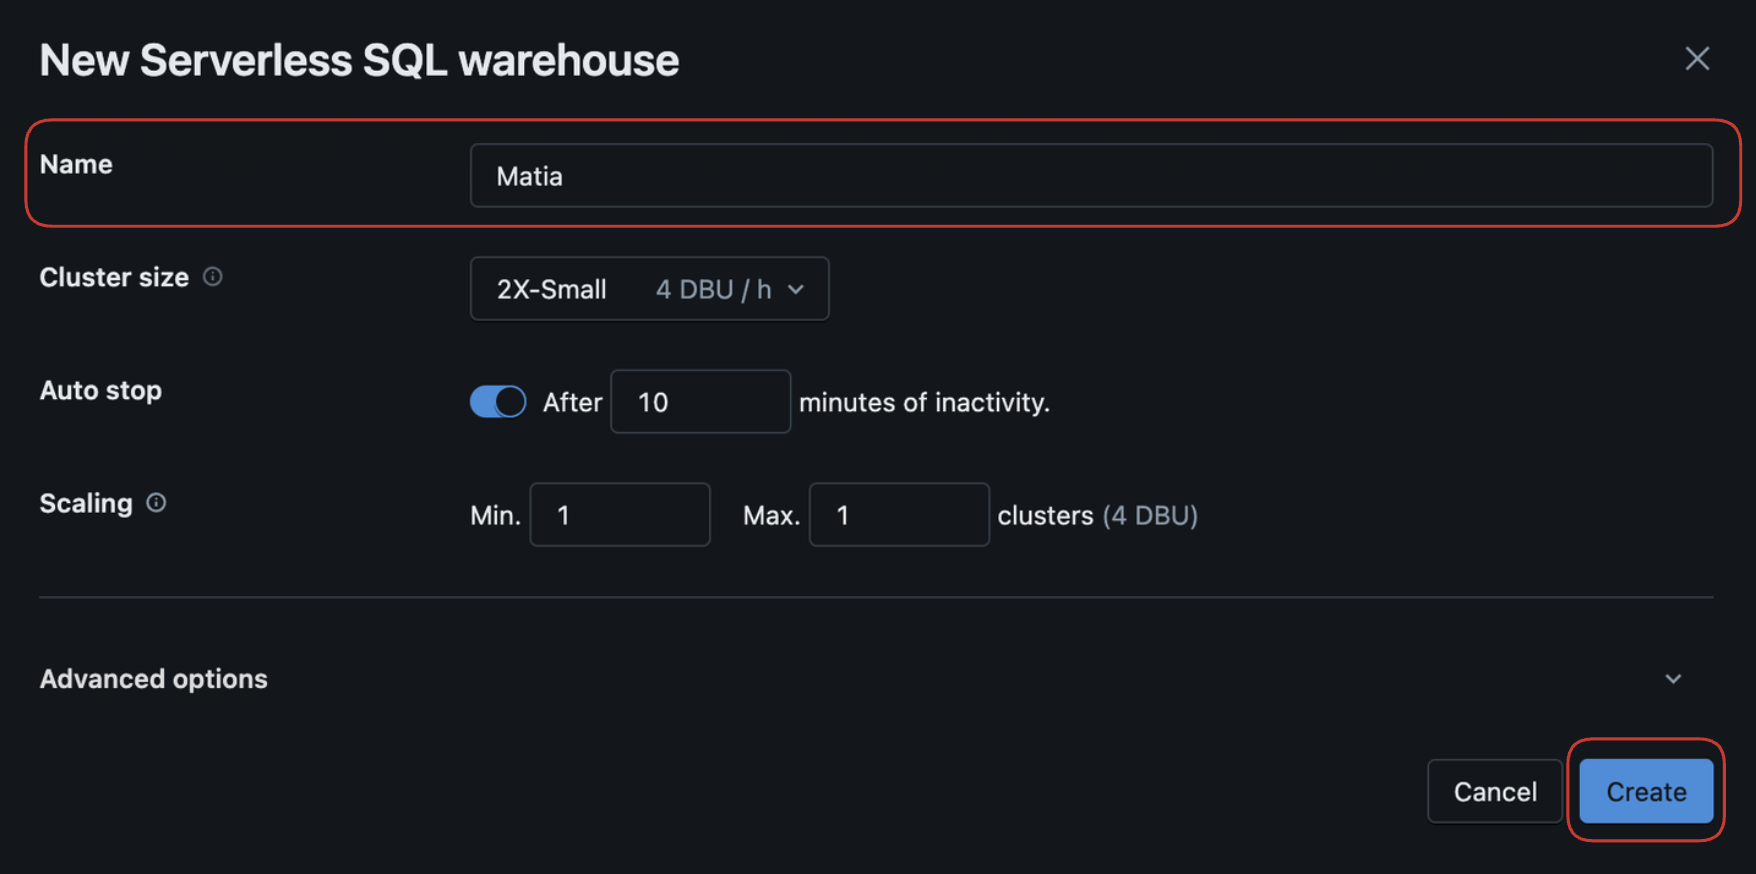
-
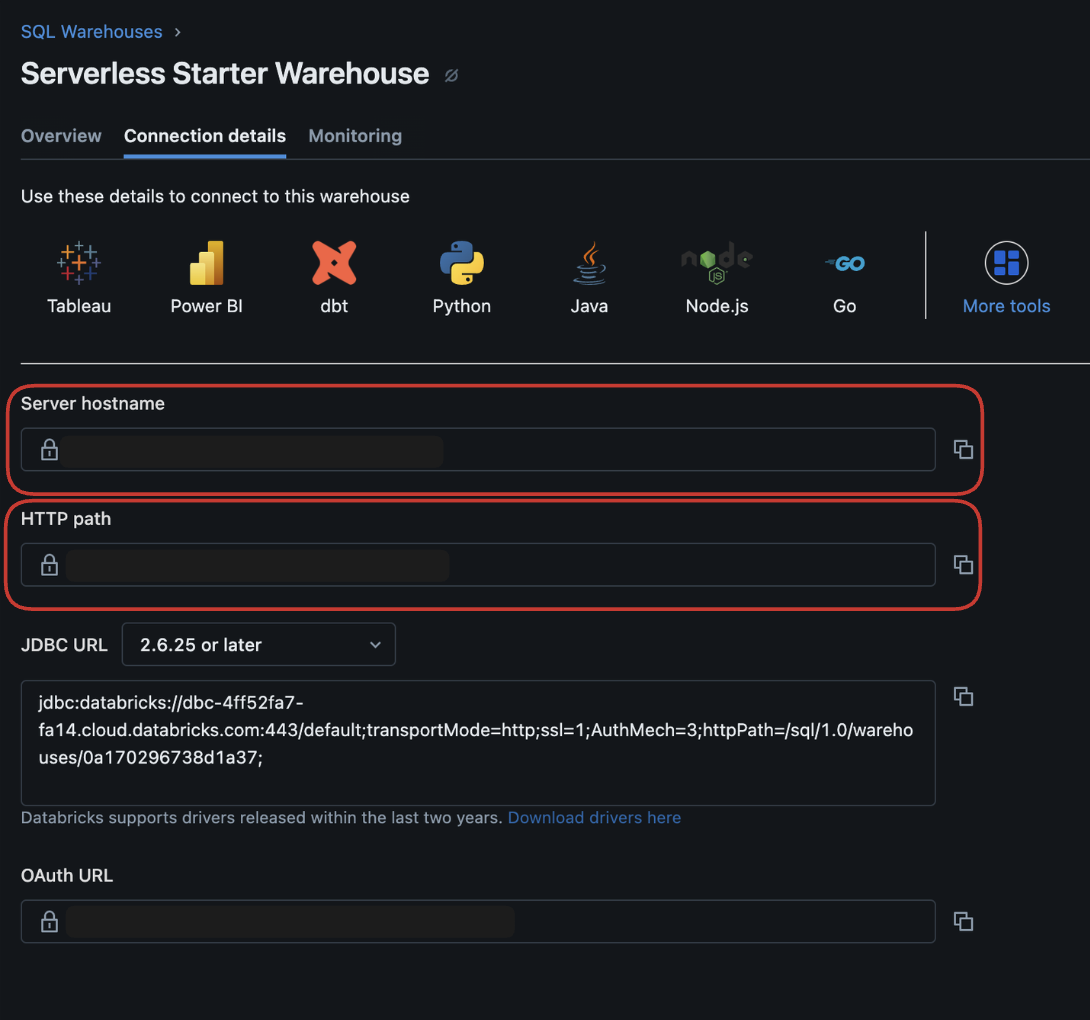
Navigate to the Connection Details tab and copy the Server Hostname, HTTP Path, and Port. If the port is not displayed, enter
443.
-
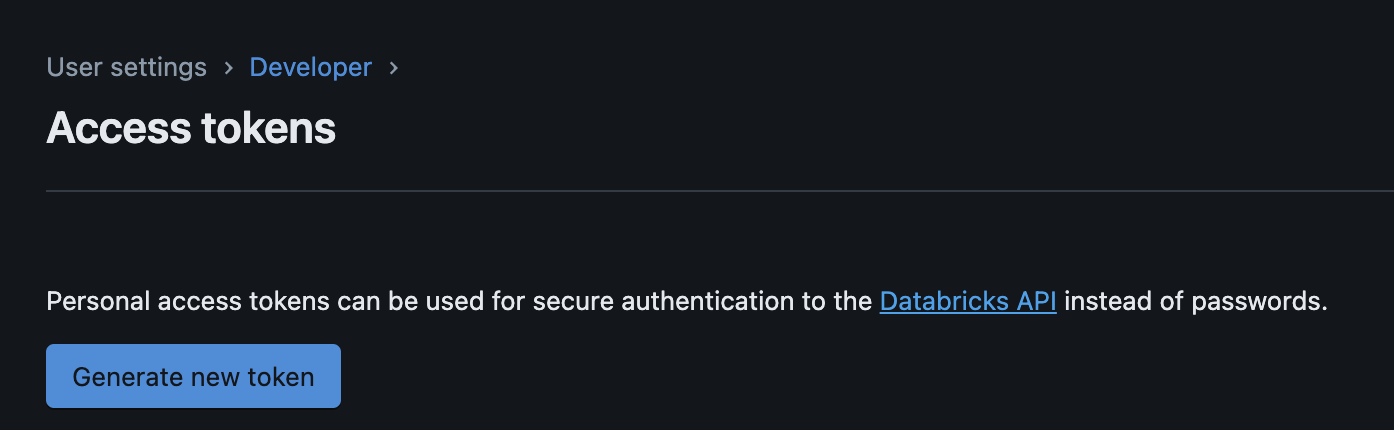
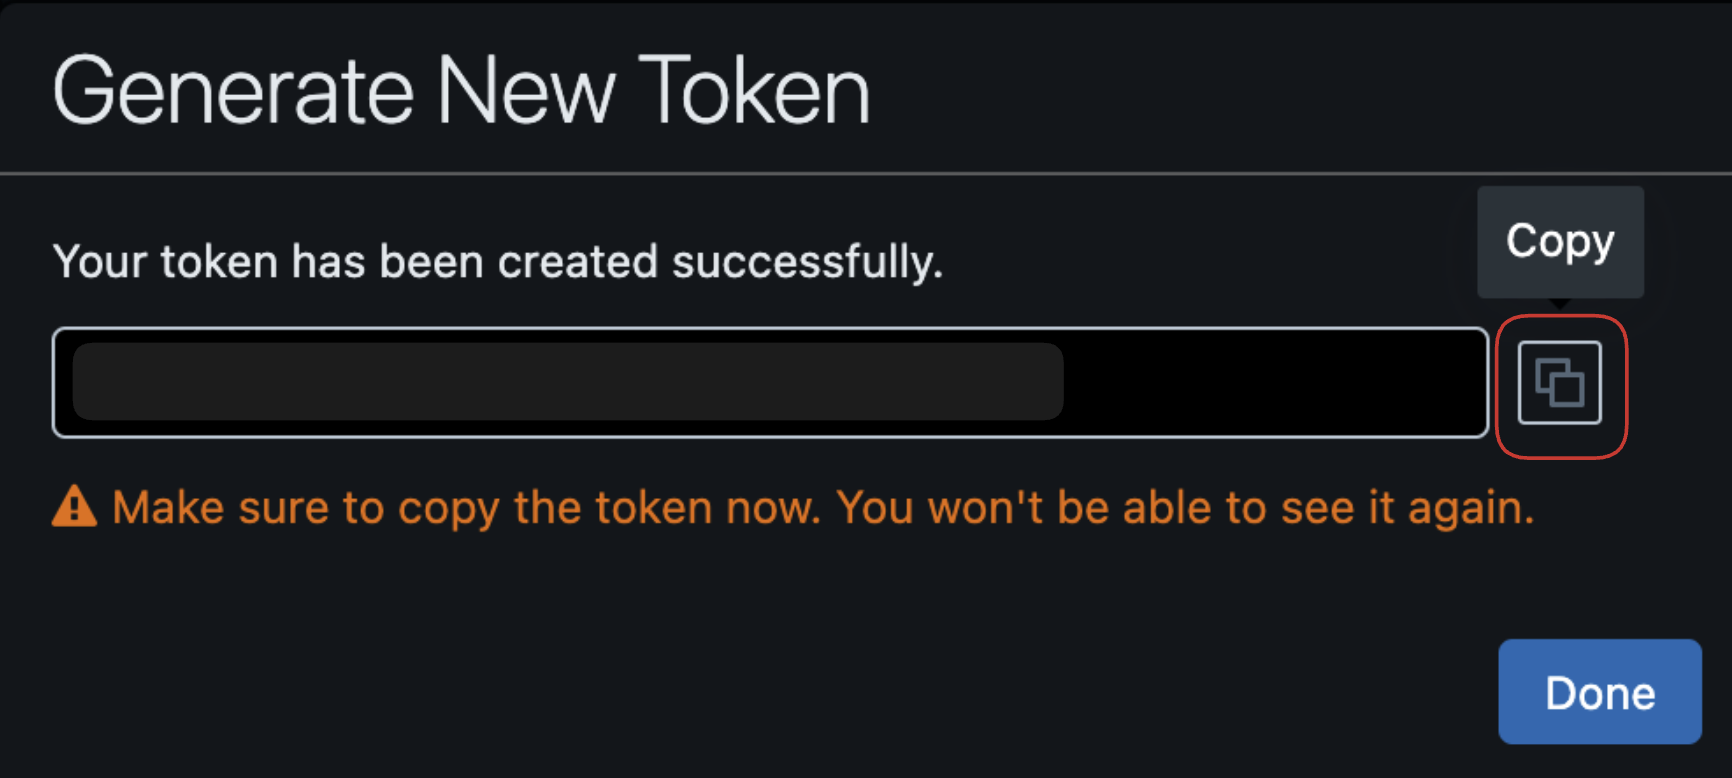
Authentication - Matia is supporting Access Token Authentication, you can follow Databricks personal access token authentication Or click on "Create a personal access token" in Connection details tab.
Required Privileges
If you do not use Unity Catalog, the user or service principal you want to use to create your access token must have the following privileges on the schema:
SELECT
MODIFY
READ_METADATA
USAGE
CREATE
If you use Unity Catalog, the user or service principal you want to use to create your access token must have the following privileges on the catalog:
CREATE SCHEMA
CREATE TABLE
MODIFY
SELECT
USE CATALOG
USE SCHEMA
For lineage extraction, the Databricks user must have access to system.access.
GRANT USE SCHEMA ON SCHEMA system.access TO `databricks_user`;
(Optional) Get your Catalog name
You can specify which catalog Matia should write to. To find your available catalogs:
- In your Databricks workspace, navigate to Catalog in the left sidebar.
- Copy the name of the catalog you want to use.
- If no catalog is specified, Matia will write to the default catalog of your SQL warehouse.
Complete Configuration in Matia
- Fill in the Server Hostname, Port, HTTP Path for your Databricks database.
- Enter a Name for the connector.
- (Optional) Enter a Description for the connector.
- Select the Owner of the connector.
- (Optional) Verify that your Databricks database is successfully connected by clicking on Test Connection.
- Click Connect.