Airtable Setup Guide
Prerequisites
- An active Airtable account
- A Personal Access Token
Setup Guide
Step 1: Retrieve Your Airtable API Key (Personal Access Token)
-
Go to the Airtable Developer Hub
-
From /create/tokens, click the “Create new token” button to create a new personal access token.
-
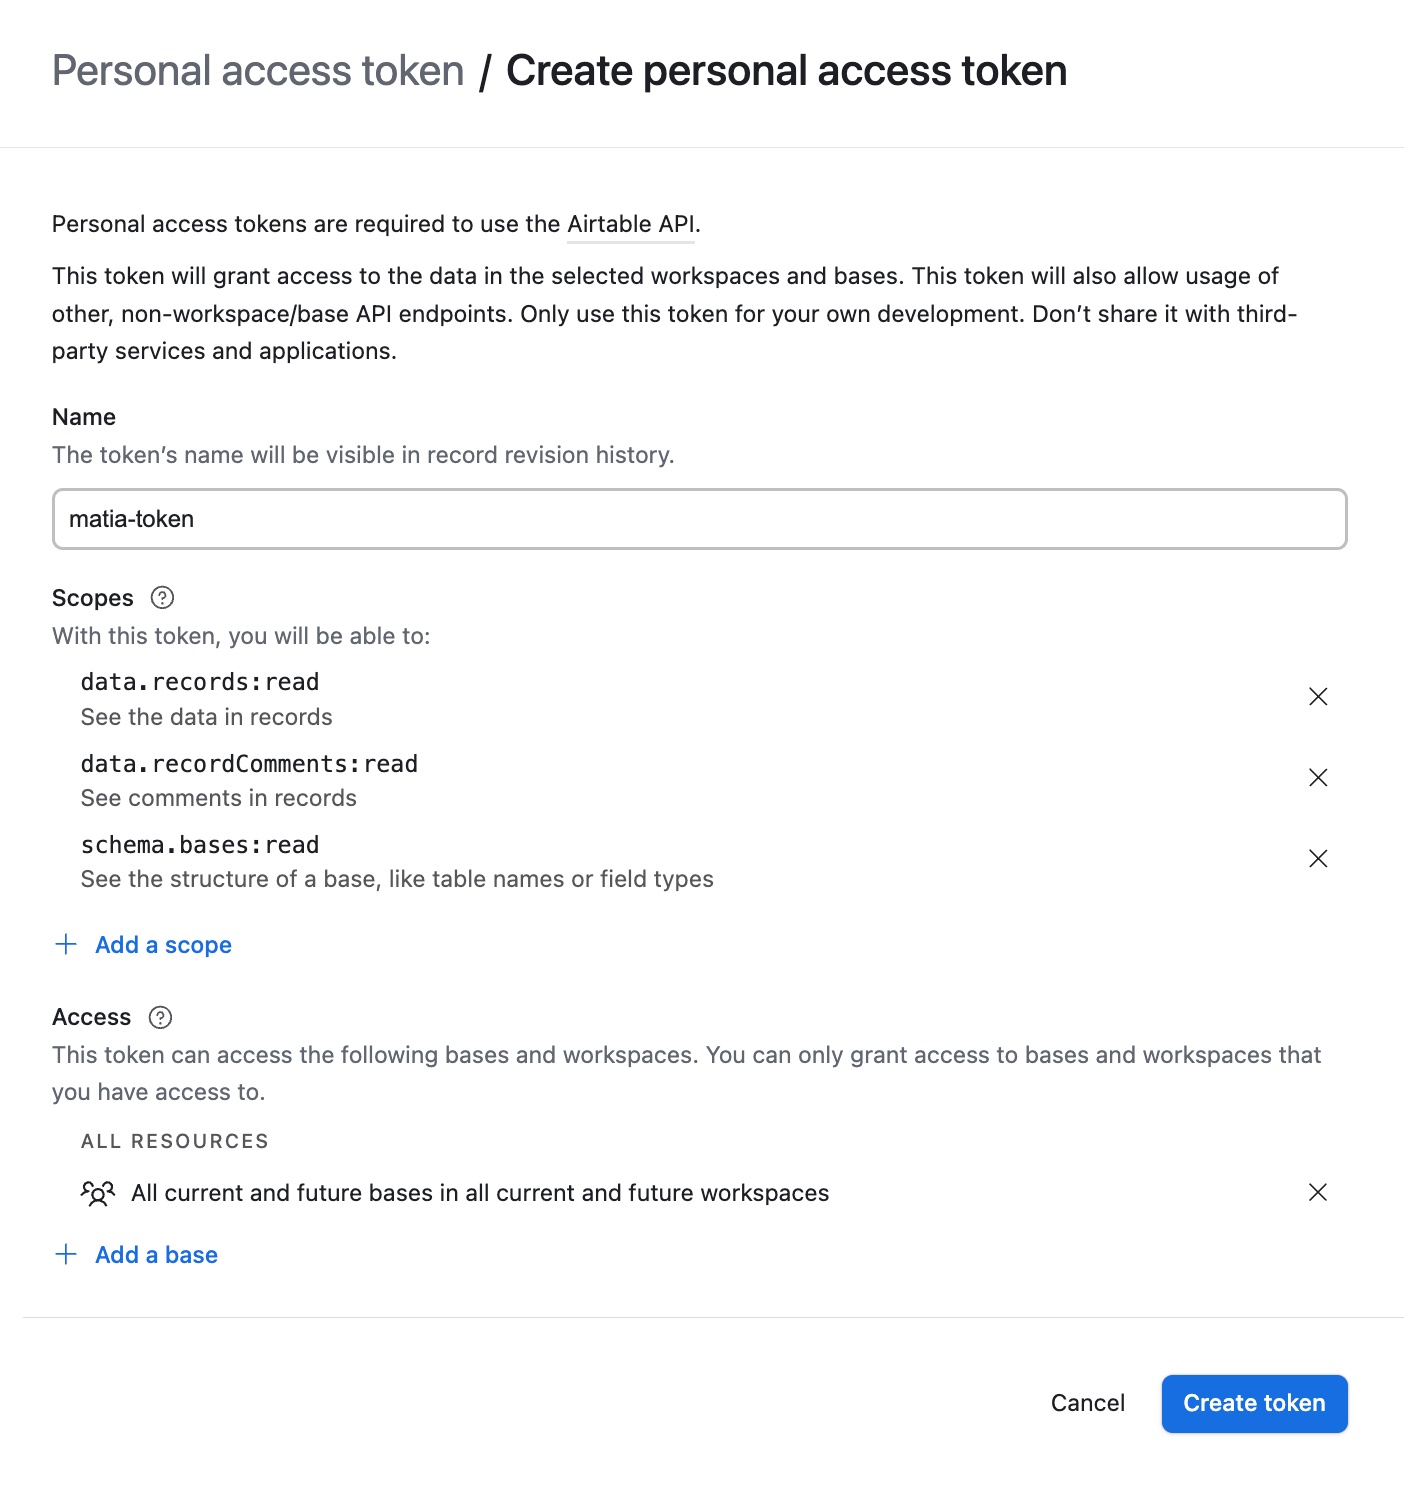
In the “Token name” field, enter a descriptive name like
Matia-Token. -
Under “Scopes”, select the following:
data.records:readdata.recordComments:read(optional, if you want to sync comments)schema.bases:read
-
Under "Access to Workspaces", choose one of:
- Allow access to all current and future bases, or
- Manually select specific bases to limit scope
-
Click Create token
-
Copy the generated Personal Access Token (PAT) and store it securely. You will not be able to view it again once you close the dialog.
Step 2: Complete Configuration in Matia
- Paste the Personal Access Token you generated.
- Enter an Asset Name.
- (Optional) Enter a Description.
- (Optional) Assign Tags.
- Select an Owner.
- Verify that your Airtable account is successfully connected by clicking on Test Connection.
- Click Connect.
Note on Table Changes in Airtable
Airtable does not track table name changes or deletions through its API. As a result:
- If you rename a table after it has already been synced, Matia will no longer recognize it. To resume syncing, you must refresh the Airtable assets’s source schema in Matia (in the integration schema tab). The renamed table will then appear as a new stream under its updated name.
- If you delete a table from Airtable after it has been synced, the integration will simply stop attempting to sync it. No new data will be ingested from that table, but existing data in your destination will remain untouched.