Create Your First Integration
Overview
This guide walks you through creating your first integration in Matia, from connecting your source and destination to running your initial sync. Upon completion, you will have a running pipeline that moves data from a source (for example Postgres or Salesforce) into a destination (for example Snowflake).
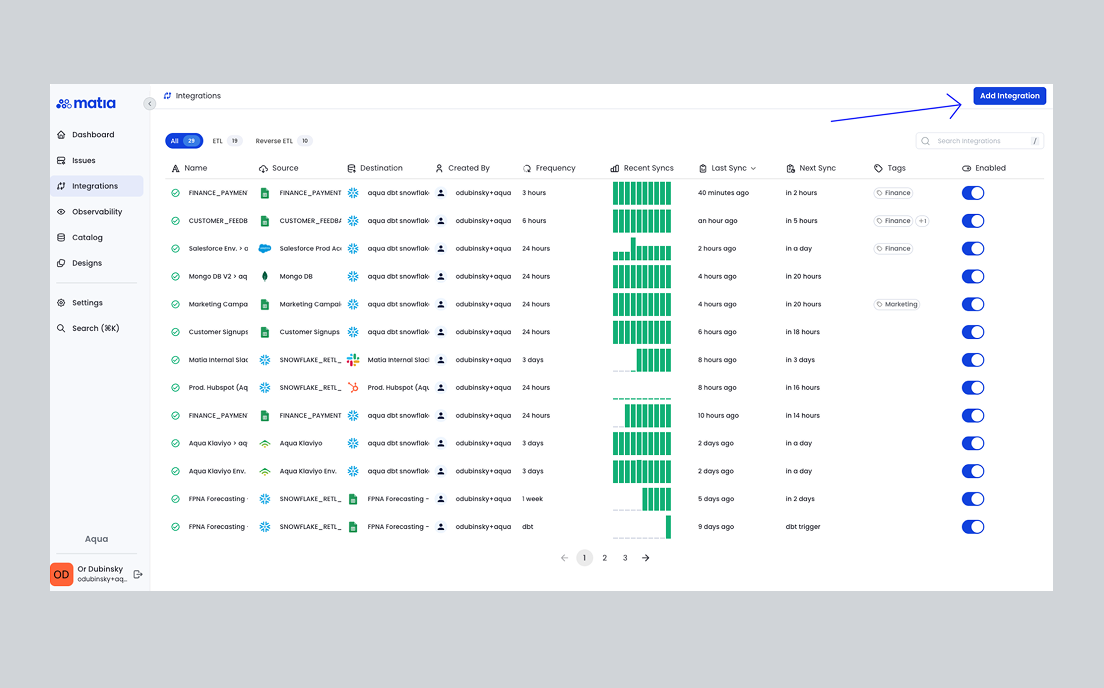
1. Add a New Integration
Start by logging into your Matia workspace. In the main navigation sidebar, click on Integrations to access the integrations overview page. Click the Add Integration button. This will open the integration setup wizard.
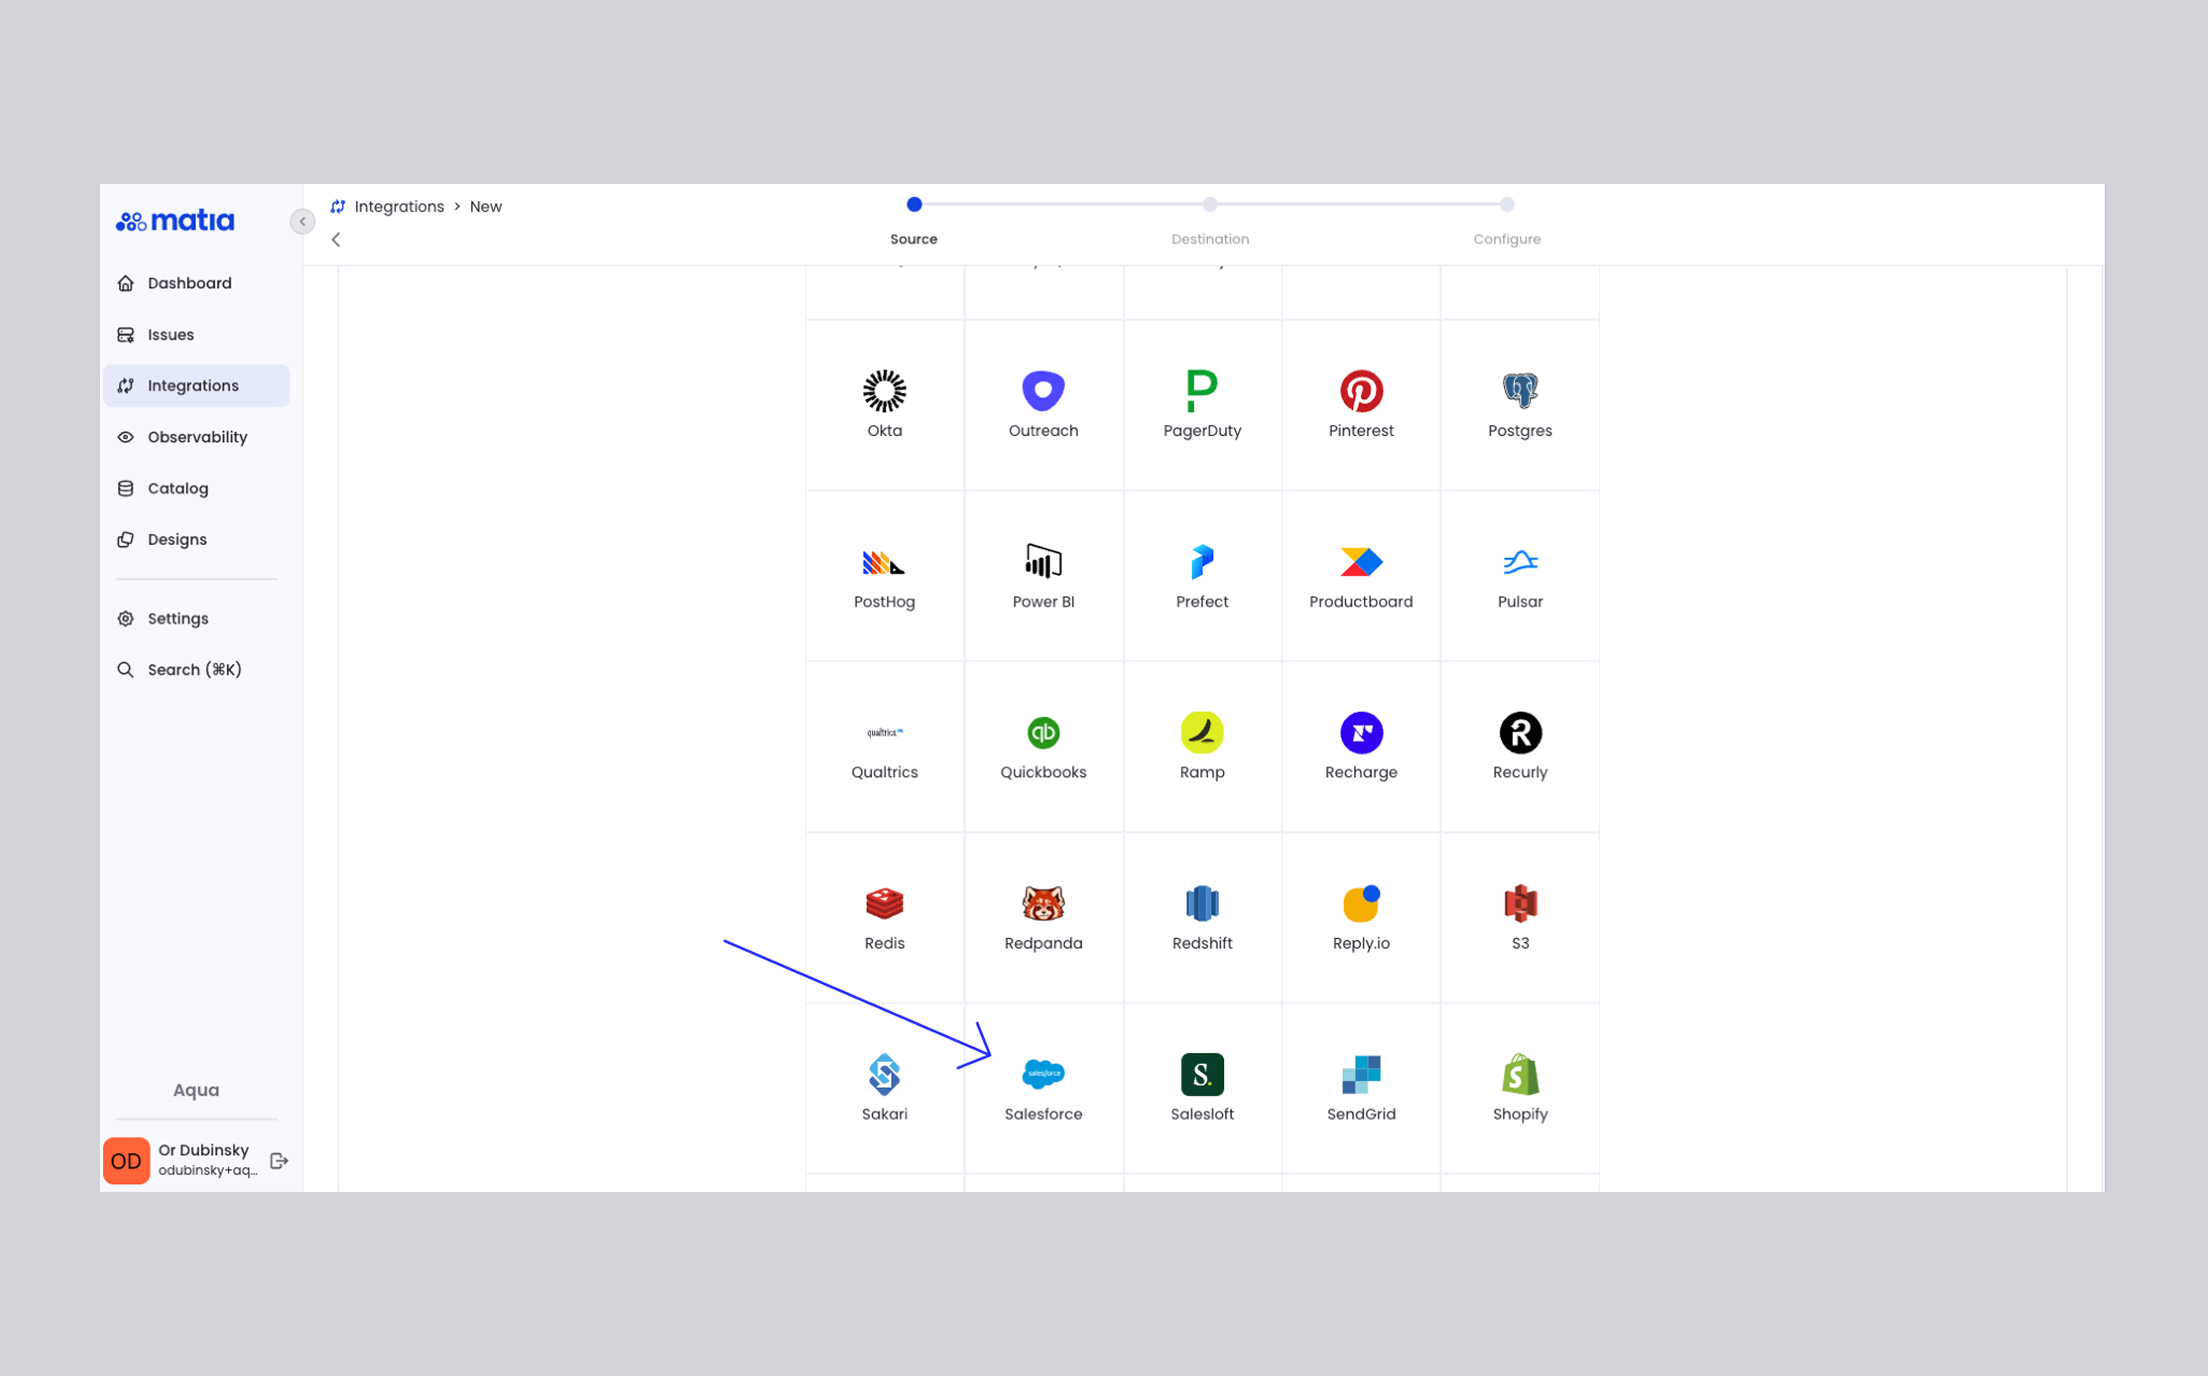
2. Select and Connect Your Source
The creation flow has three steps: choose a source, choose a destination, then configure the integration. You can connect a new source or destination during this flow, or select one already connected in your environment. In this step, either connect a new asset or select an existing source. For this example we use Salesforce as the source.
- In the source selection screen, search for and select Salesforce (or your chosen source type).
- Choose whether you're looking to connect a Salesforce production or sandbox environment.
- Use the Connect with Salesforce button to authenticate via OAuth. Follow the prompts to log in to your Salesforce account and authorize Matia. If connecting a new source: complete Authenticate, any connector-specific Configure options, Name (and optional description), then optionally assign tags and owners.
- Once authenticated, fill out a name for your new source and select Test Connection to verify that the authentication was successful, then Connect.
After the source is connected, select it and click Next.
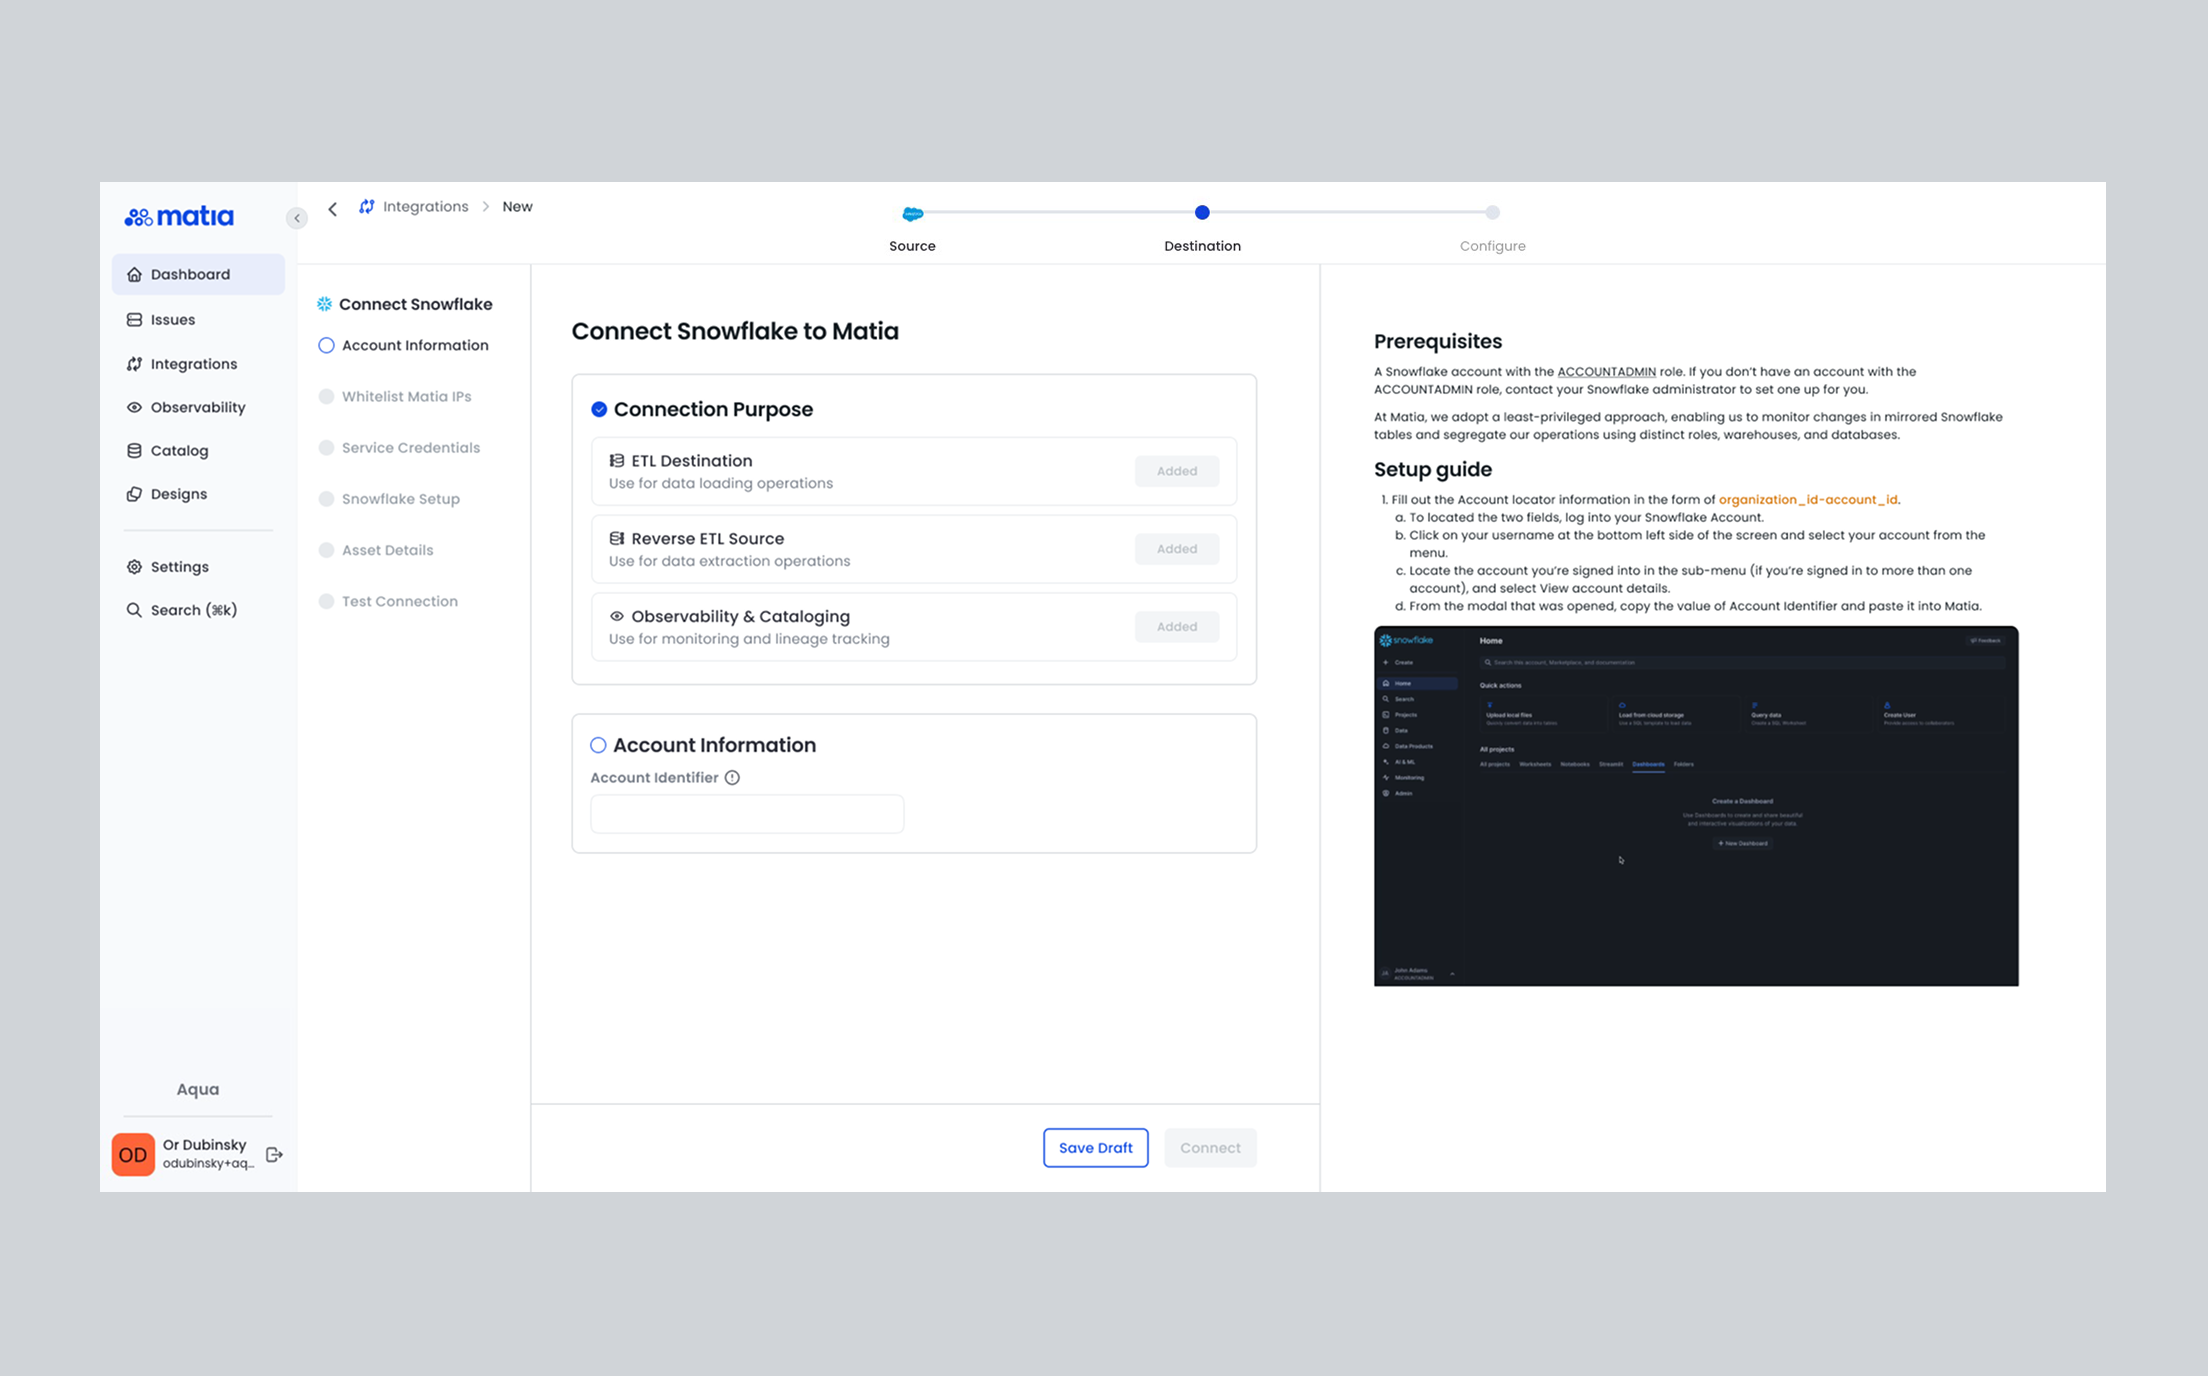
3. Select and Connect Your Destination
Next, set up your destination. In this step, either connect a new asset or select an existing destination. This example uses Snowflake.
- In the destination selection screen, search for and select Snowflake (or your chosen destination).
- Follow the steps in the detailed setup guide walking you through configuring your Snowflake account details.
- If connecting new: complete authentication, configuration, name, and optionally tags and owners.
- Click Test Connection to ensure everything is set up correctly, then click Save or Connect.
Select the destination and click Next to reach the configuration step.
4. Define the Integration
Configure your integration details on the Configure step. Options may vary by source and destination. For ETL you will typically set:
- Choose a trigger type for your syncs:
- Manual: Run syncs on demand.
- Fixed Interval (By interval): Set a schedule such as every 6 hours, 30 minutes, or 24 hours, with a customizable base time.
- Cron Expression: For advanced scheduling, enter a cron string (e.g.,
0 2 * * *to run every day at 2:00 AM).
- Select how you'd like to handle Schema Changes:
- Enable all schema changes: Automatically add data from new schemas, tables, and columns as they appear in your source.
- Enable only new columns: Add data from new columns, but ignore new schemas and tables.
- Ignore all schema changes: No new data structures will be added automatically.
- Data processing location: e.g. US or EU (when the connector supports it).
- Select the destination schema (or database) in Snowflake where Matia should save the data.
If the connector supports it, you may also see options such as custom warehouse or custom database (e.g. Snowflake). Click Save or Create to create the integration.

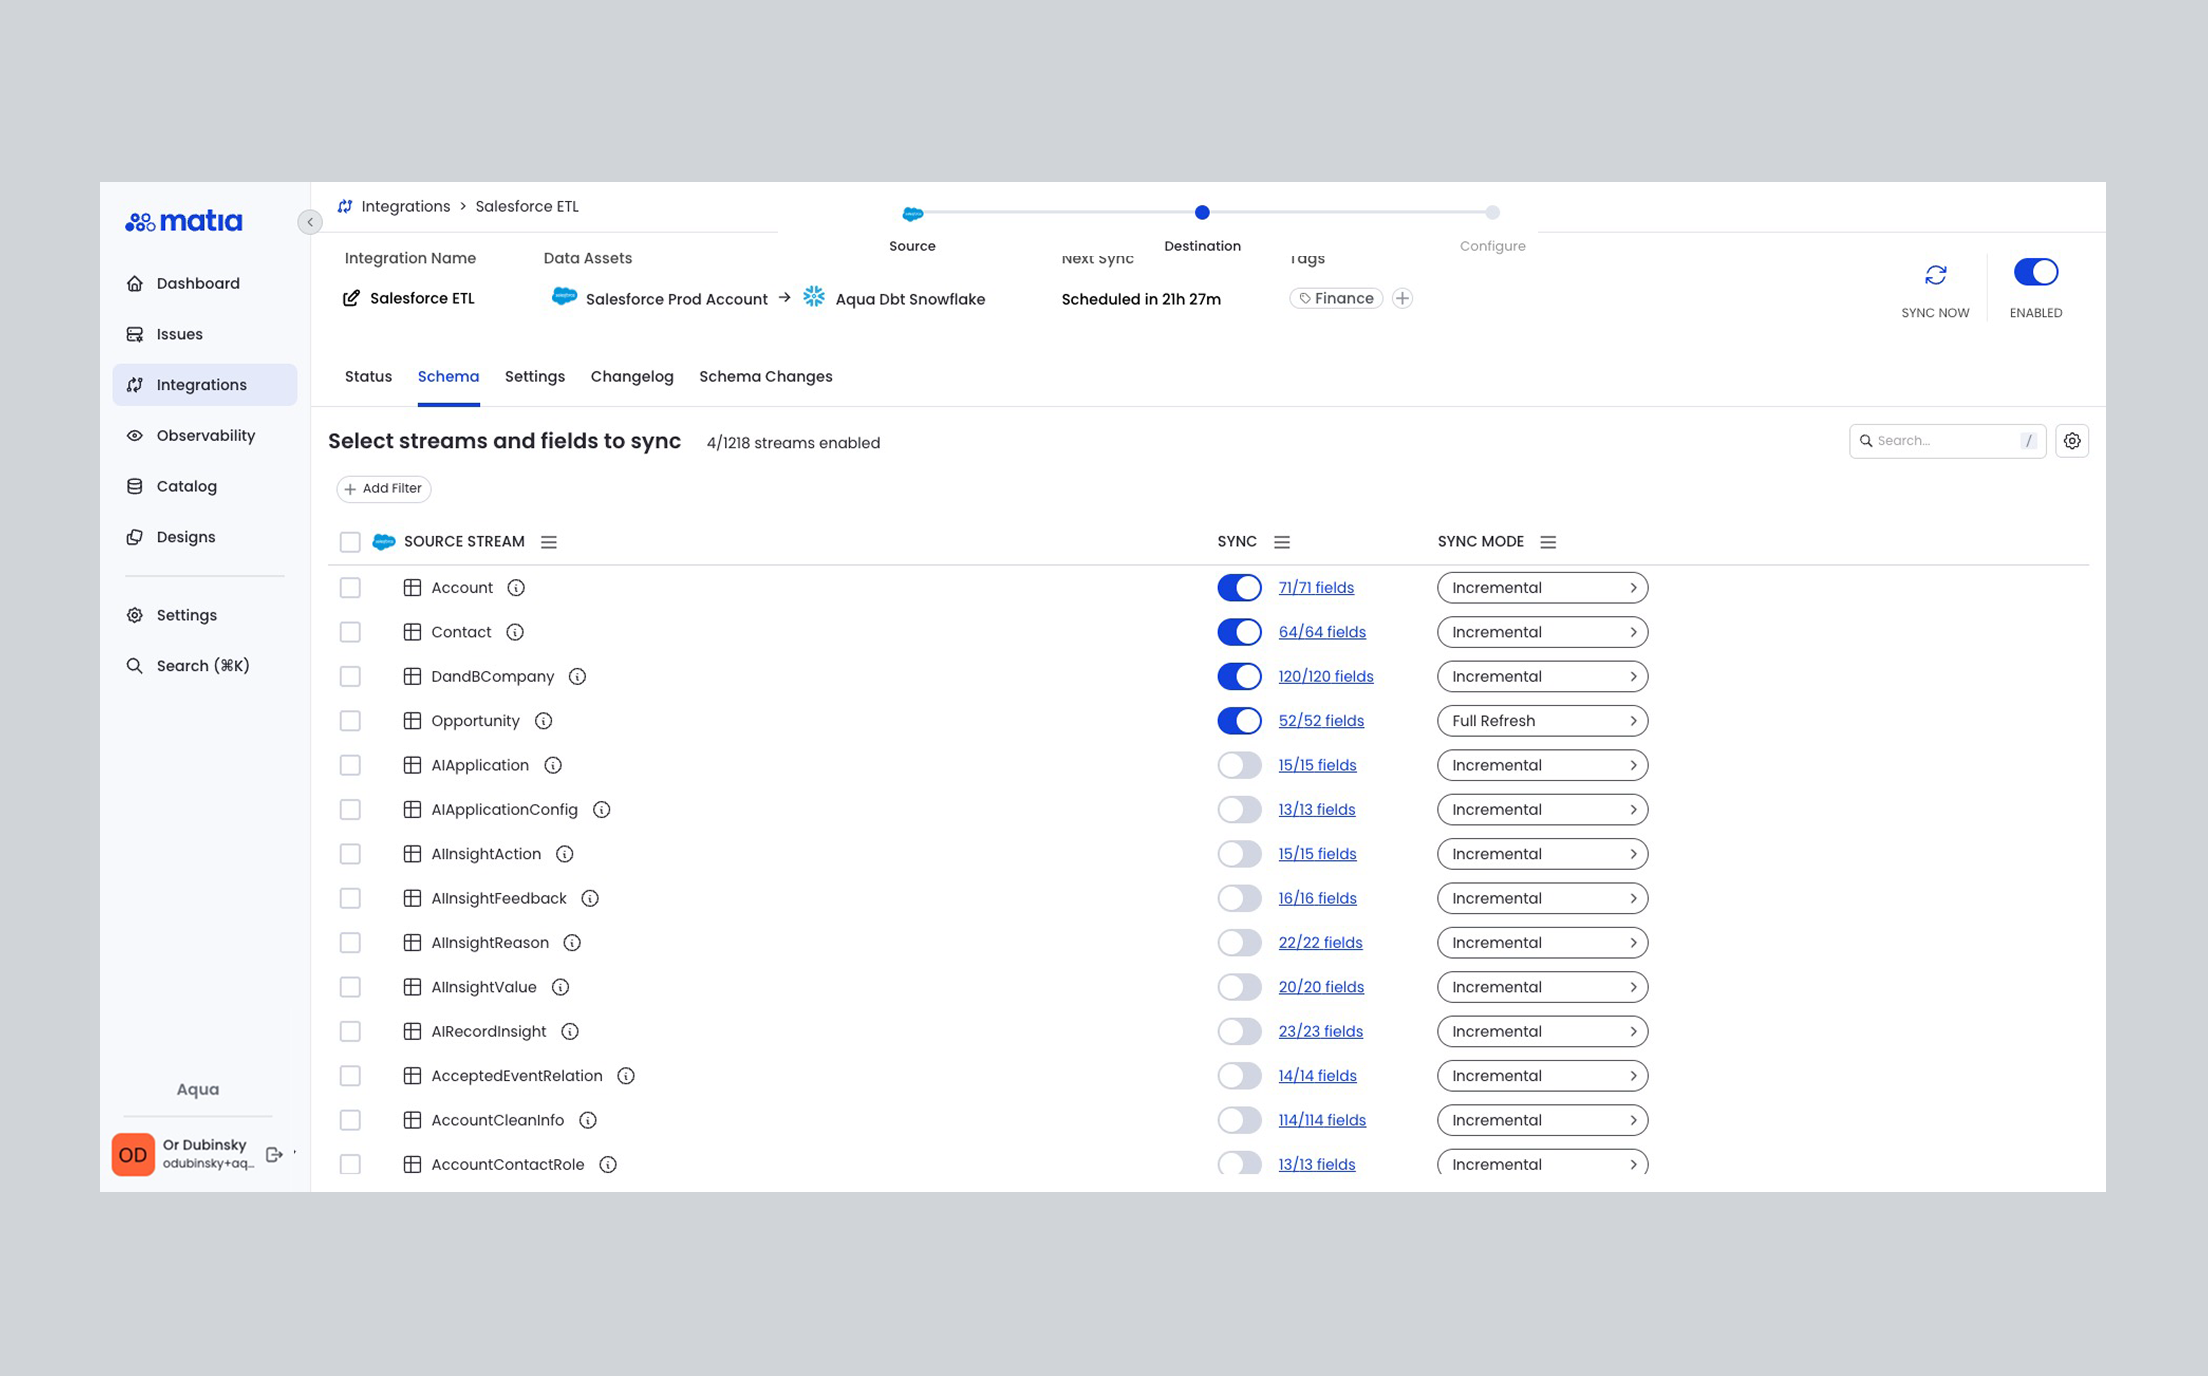
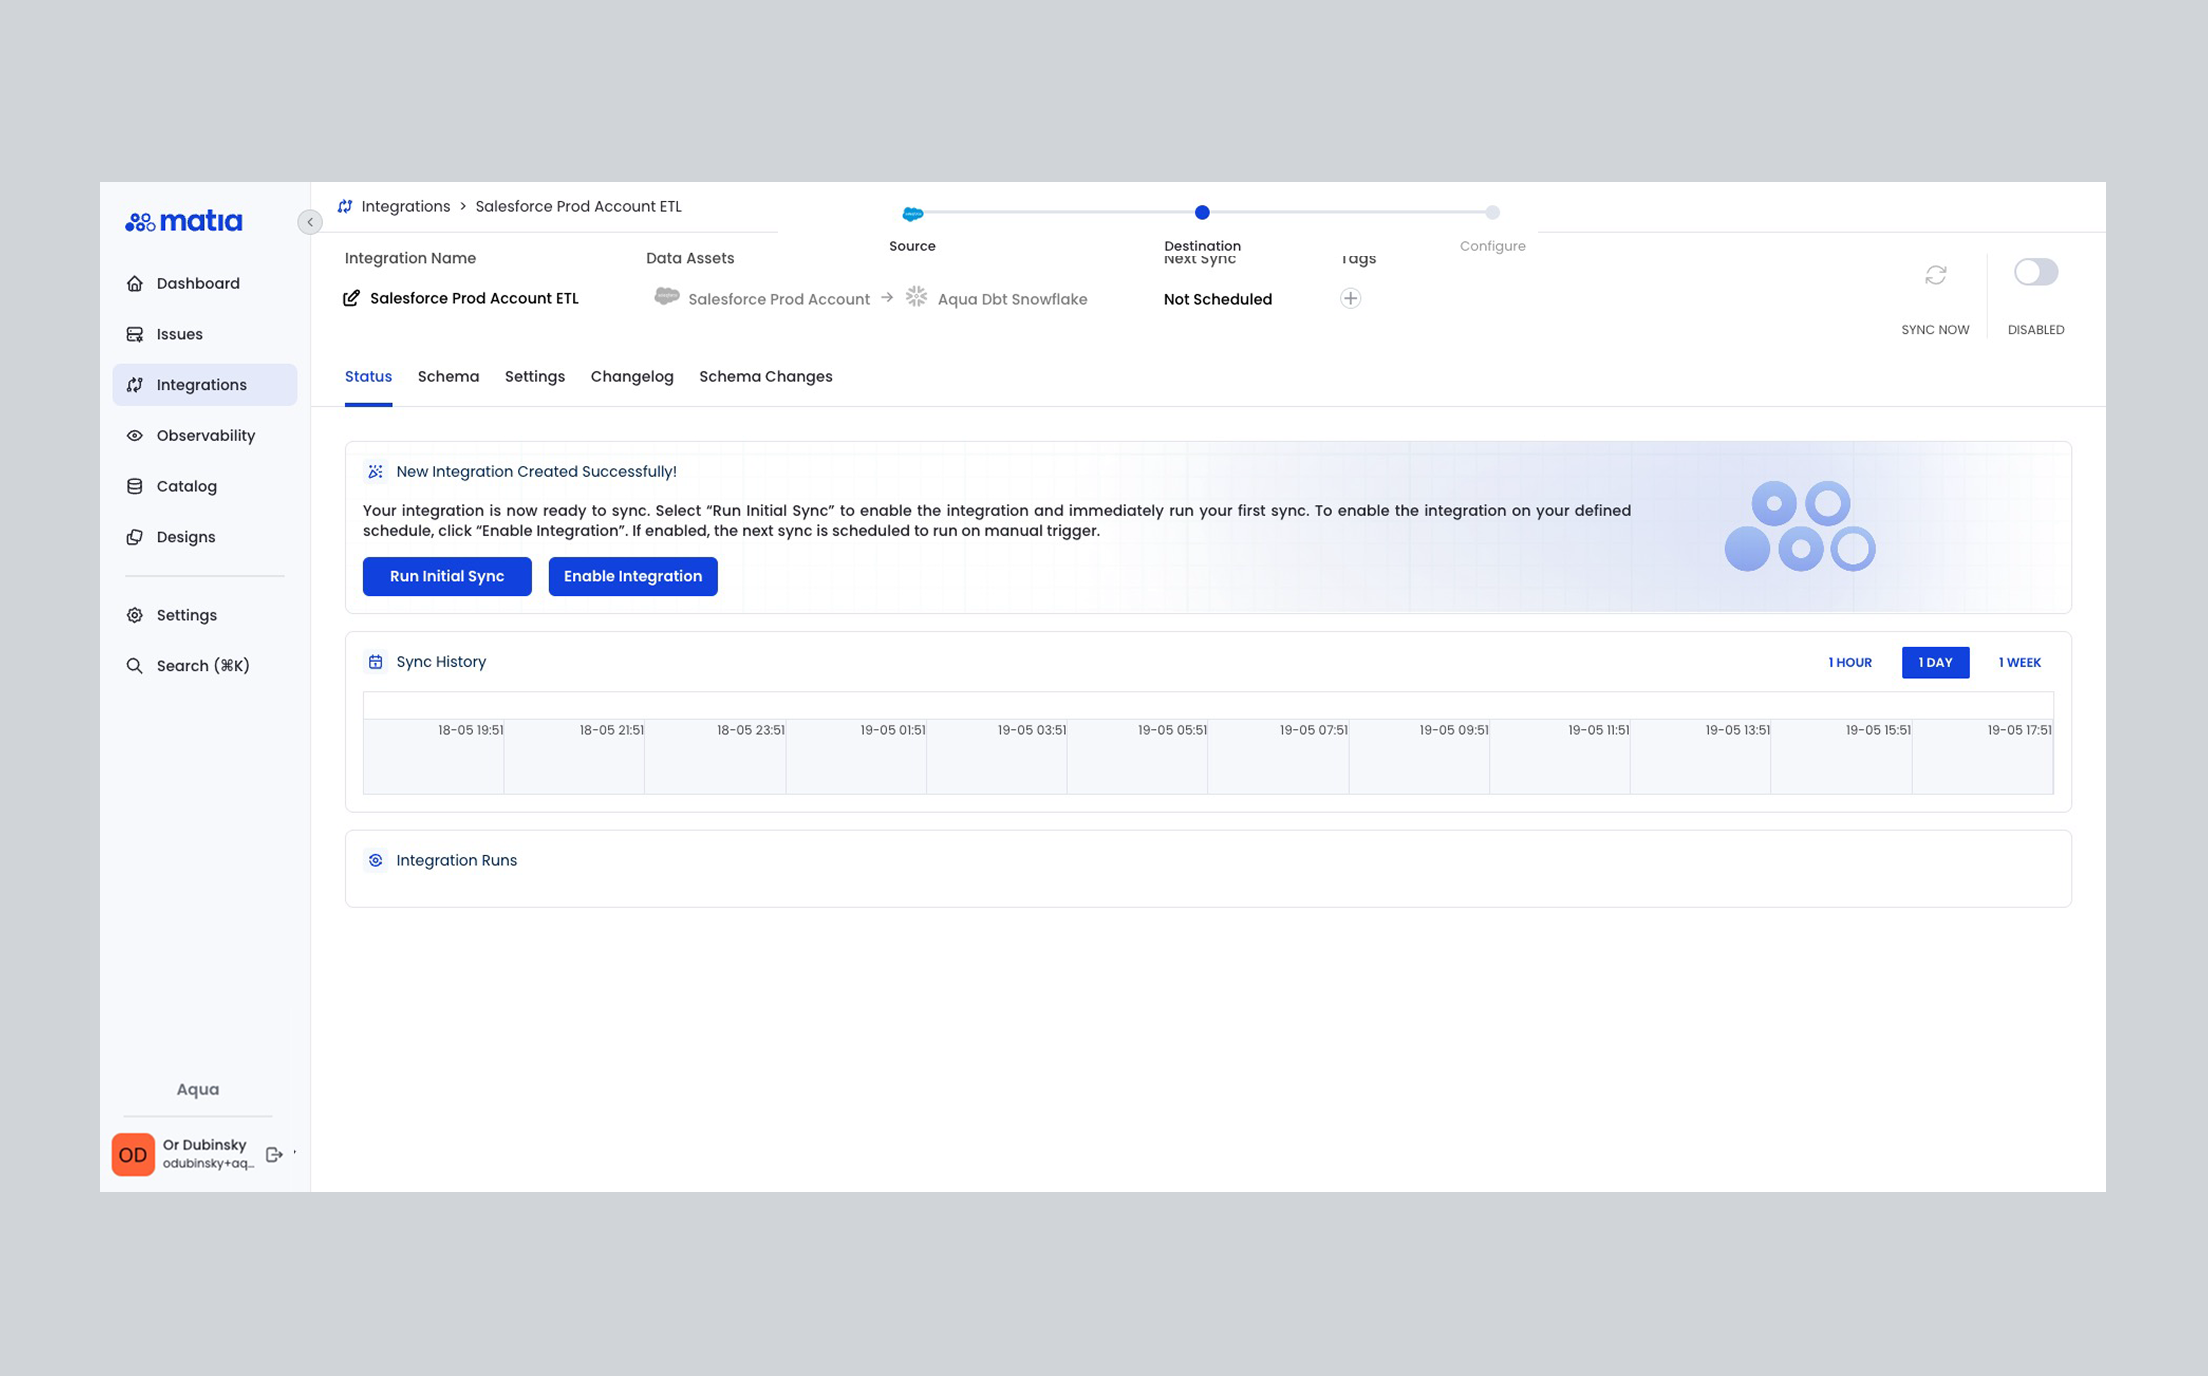
5. Choose Your Integration Schema
After creation, the integration details page opens. Open the Schema tab.
- Using the Schema tab, decide whether to bring in all supported tables or modify the integration schema and select only the specific streams and fields you need.
- Enable or disable tables to control which streams are included in each sync.
- Where supported, set sync mode per table: Full refresh, Incremental, or Append only. For incremental syncs that support a cursor, select the cursor field. Options vary by source; only the modes and fields supported for your connector are shown.
- Matia allows you to enable/disable individual tables and columns, so you can control exactly what data is moved.
Save your choices. The integration is now configured to sync the selected data.
6. Enable and Run the Integration
- Once your schema is set, click Run Initial Sync to start your first data transfer (or use Sync now from the integration header to run a sync manually). Matia will extract data from your source and load it into your chosen destination schema.
Monitor the sync progress in real time on the Status tab, review emitted and committed records per stream, and check for schema changes or issues from the integration overview page. When the sync completes you will see:
- Number of tables synced
- Emitted records (processed from the source) and Committed records (written to the destination)
- Start time, end time, and duration
A difference between emitted and committed is normal when Matia applies normalization or transformations.
Next Steps:
See Configure incremental sync for ongoing syncs, Manage schema changes when your source schema evolves, and How ingestion works and Sync modes for concepts. You can also configure data observability, set up post-run actions, or review integration sync data for your pipeline.